Beranda
/ How To Measure Picture Frame Molding / Diy Picture Frame Moulding Shades Of Blue Interiors / For photography a gallery style is very common where the idea is to have a narrow frame to help keep the frame from detracting from the print.
How To Measure Picture Frame Molding / Diy Picture Frame Moulding Shades Of Blue Interiors / For photography a gallery style is very common where the idea is to have a narrow frame to help keep the frame from detracting from the print.
Insurance Gas/Electricity Loans Mortgage Attorney Lawyer Donate Conference Call Degree Credit Treatment Software Classes Recovery Trading Rehab Hosting Transfer Cord Blood Claim compensation mesothelioma mesothelioma attorney Houston car accident lawyer moreno valley can you sue a doctor for wrong diagnosis doctorate in security top online doctoral programs in business educational leadership doctoral programs online car accident doctor atlanta car accident doctor atlanta accident attorney rancho Cucamonga truck accident attorney san Antonio ONLINE BUSINESS DEGREE PROGRAMS ACCREDITED online accredited psychology degree masters degree in human resources online public administration masters degree online bitcoin merchant account bitcoin merchant services compare car insurance auto insurance troy mi seo explanation digital marketing degree floridaseo company fitness showrooms stamfordct how to work more efficiently seowordpress tips meaning of seo what is an seo what does an seo do what seo stands for best seotips google seo advice seo steps, The secure cloud-based platform for smart service delivery. Safelink is used by legal, professional and financial services to protect sensitive information, accelerate business processes and increase productivity. Use Safelink to collaborate securely with clients, colleagues and external parties. Safelink has a menu of workspace types with advanced features for dispute resolution, running deals and customised client portal creation. All data is encrypted (at rest and in transit and you retain your own encryption keys. Our titan security framework ensures your data is secure and you even have the option to choose your own data location from Channel Islands, London (UK), Dublin (EU), Australia.
How To Measure Picture Frame Molding / Diy Picture Frame Moulding Shades Of Blue Interiors / For photography a gallery style is very common where the idea is to have a narrow frame to help keep the frame from detracting from the print.. Measure and mark 2″ over from the door trim, and 2″ down from the chair rail and ceiling, and 2″ up from the chair rail and baseboard. Gather a calculator, a tape measure, and paper and pencil and measure the width and height of your wall from the ceiling to the top of the baseboard. (we removed our existing baseboard and installed the molding as our new baseboard.) So i subtracted 21 inches from the total wall width (152 inches) and then divided that number by 5 to arrive at the width needed for each picture frame. Measuring and deciding how much molding you'll need:
It is a common mistake to think the dimensions are the width and height of its outside edges. Then measure the width and length of your prepared artwork, and add two times the molding width (not counting the rabbet) to each dimension. You have to account for all eight cuts to properly measure the length of your picture frame moulding. The width of the moulding (w) rabbet width (r) − not height the amount of material lost between pieces on your chopper or saw (c) What follows are the steps i went through to get the.
Laying Out Wainscoting With Buildcalc Thisiscarpentry from mk0thisiscarpen83ynj.kinstacdn.com In regards to the frame border again, no hard fast rules, but it does not make much sense to use a 3 inch wide frame moulding for an 8x10 picture frame. C) it's not a difficult diy project (unlike the crown molding i put up a few weeks ago). Typically picture frame moulding frames are spaced out 3″ to 4″. Base cap molding has a thin, delicate profile, but because i wanted a chunkier look for this room, i chose this primed pine casing.it cost about 91 cents per linear foot and i needed a little over 300 feet for the entire room. For example, if you are using a 2 moulding, you multiply two and eight to get 16. The width of the moulding (w) rabbet width (r) − not height the amount of material lost between pieces on your chopper or saw (c) 1 in = 25.4 mm = 2.54 cm always make sure you know which unit of measurement you're dealing with to make sure results are accurate. If you're planning on trimming your print, please do so before taking measurements.
A frame's dimensions refer to the size of its opening.
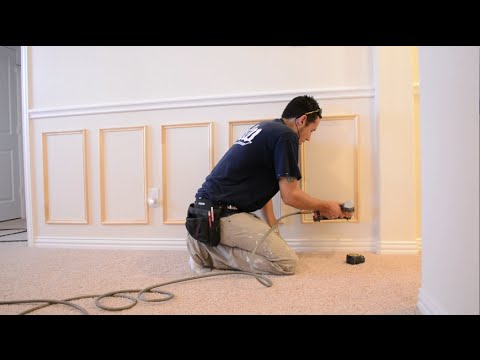
Measure each corner wall angle to help calculate the correct miter angle. Measure and mark 2″ over from the door trim, and 2″ down from the chair rail and ceiling, and 2″ up from the chair rail and baseboard. To this, please also note: Move the molding along the fence until the measurement mark is on the right edge of the saw blade path. While the height h of each frame will be the same for each wall, the width will differ depending on the length of the wall and the number of picture frames you intend on using. Measure placement determine where you'd like your wall frame molding to hang and mark on the wall. Reasons to install picture frame moulding diy. For photography a gallery style is very common where the idea is to have a narrow frame to help keep the frame from detracting from the print. Typically picture frame moulding frames are spaced out 3″ to 4″. (we removed our existing baseboard and installed the molding as our new baseboard.) Watch the video tutorial on how to make a picture frame from scratch using moulding. In regards to the frame border again, no hard fast rules, but it does not make much sense to use a 3 inch wide frame moulding for an 8x10 picture frame. Be as precise as possible when measuring, and then divide the total by the length of the molding and add 10 percent more to the total to account for bad cuts [source:
Casing moulding 1/4″ x 1 1/4″ in size similar to this one or this casing moulding, primed white; In addition, the detailed video shows what picture framing supplies you. If you're planning on trimming your print, please do so before taking measurements. Then, i used 5 to space them apart, so came in from the doorframe about 5. Measure placement determine where you'd like your wall frame molding to hang and mark on the wall.
Making The Perfect Frame Wood Magazine from static.woodmagazine.com Lengths range in condition from as new (grade a), great for any diy framing project, to noticable damage (grade d) which can be used for small frames or to practice. However, you want to measure the inside. 4 1/2 inches from the bottom of the chair rail and the same from the baseboard molding up. All of our frames are measured by the inside dimensions. C) it's not a difficult diy project (unlike the crown molding i put up a few weeks ago). Finally, add an extra 1/8 in. (we removed our existing baseboard and installed the molding as our new baseboard.) A frame's dimensions refer to the size of its opening.
1 in = 25.4 mm = 2.54 cm always make sure you know which unit of measurement you're dealing with to make sure results are accurate.
The width of the moulding (w) rabbet width (r) − not height the amount of material lost between pieces on your chopper or saw (c) The length of each piece of moulding is measured along the outside edge from corner to corner. Lay and flatten your print on a level surface take the measurements of the height and width of the area you'd like to frame. (we removed our existing baseboard and installed the molding as our new baseboard.) What follows are the steps i went through to get the. B) it adds a great final touch to the room. The picture frame moulding by the front door (behind the ladder) is sized from top to bottom (height) like the rest of the foyer (based on wall #1) but the size of the frame (width) is set to scale based on the visual balance in this corner and the accessories that will be added later. For photography a gallery style is very common where the idea is to have a narrow frame to help keep the frame from detracting from the print. Measure and mark 2″ over from the door trim, and 2″ down from the chair rail and ceiling, and 2″ up from the chair rail and baseboard. Lengths range in condition from as new (grade a), great for any diy framing project, to noticable damage (grade d) which can be used for small frames or to practice. I hope this helps you to create your own simple picture frame mouldings in your home. While the height h of each frame will be the same for each wall, the width will differ depending on the length of the wall and the number of picture frames you intend on using. For example, if you have a 4x6 image, you will want to order a 4x6 frame.
To accurately assess your picture frame moulding needs, you will need to collect the following data: Using a scrap piece of 1×4 i traced out the spacings and placement for the frames. In some cases art or photos are measured using millimeters (mm) or centimeters (cm), both part of the metric system (an internationally recognized system of measurement). Be as precise as possible when measuring, and then divide the total by the length of the molding and add 10 percent more to the total to account for bad cuts [source: Picture frames and boxes require joining two boards to create a right angle.
How To Install Chair Rail And Picture Frame Moulding Youtube from i.ytimg.com Then measure the width and length of your prepared artwork, and add two times the molding width (not counting the rabbet) to each dimension. Casing moulding 1/4″ x 1 1/4″ in size similar to this one or this casing moulding, primed white; In addition, the detailed video shows what picture framing supplies you. To ensure your frames look scaled to the rest of your room, measure the length of the wall and decide how many frames you'd like per wall and how far apart you'd like them to hang. Measure placement determine where you'd like your wall frame molding to hang and mark on the wall. Lay and flatten your print on a level surface take the measurements of the height and width of the area you'd like to frame. Then, i used 5 to space them apart, so came in from the doorframe about 5. Using a scrap piece of 1×4 i traced out the spacings and placement for the frames.
Some walls meet in unusual angles.
Watch the video tutorial on how to make a picture frame from scratch using moulding. Measure and decide how much molding you'll need gather a calculator, a tape measure, and paper and pencil and measure the width of your wall from corner to corner and the height from the ceiling to the floor. Measure each corner wall angle to help calculate the correct miter angle. Measure corner placement of moulding. In some cases art or photos are measured using millimeters (mm) or centimeters (cm), both part of the metric system (an internationally recognized system of measurement). If each rail is 1 3/4 wide, round them up to 2 (this leaves some wiggle room), meaning we need a board that is at least 4 wide to start. Install picture frame molding that create the effect of wainscoting witho. Lengths range in condition from as new (grade a), great for any diy framing project, to noticable damage (grade d) which can be used for small frames or to practice. To each dimension so the backed and matted artwork fits easily inside the frame. Some walls meet in unusual angles. You have to account for all eight cuts to properly measure the length of your picture frame moulding. It is a common mistake to think the dimensions are the width and height of its outside edges. For photography a gallery style is very common where the idea is to have a narrow frame to help keep the frame from detracting from the print.